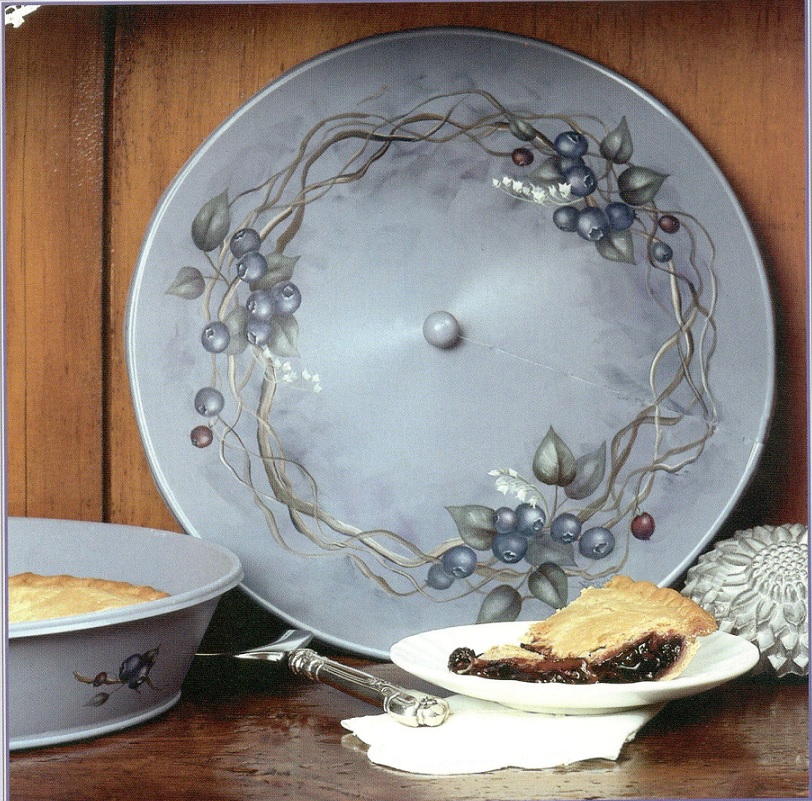
Here`s a pretty and practical way to store your home-baked pies!
Materials
Palette
- Delta Ceramcoat Acrylics Burnt Umber (BU)
- Cape Cod Blue (CCB)
- Fjord Blue (FB)
- Hammered Iron (HI)
- Liberty Blue (LB)
- Light Ivory (LI)
- Maroon (MA)
- Midnight Blue (MB)
- Purple (PU)
- Salem Green (SG)
Brushes
Silver Brush Ltd.
•Series 2000S No. 2 round
•Series 2002S No. 2 bright
•Series 2005S No. 2/0 liner
•Series 2006S 1/2″ angular
•Series 2008S 3/4″ square wash Small scruffy brush Sponge brush
Other Supplies
•Viking Woodcrafts tin pie keeper
•Vinegar
•Delta Ceramcoat Metal Primer
•Tracing paper
•Transfer paper
•Stylus
•Palette paper
•Paper towels
•Water container
•Delta Top Coat Satin Spray
Preparation
1. Wash the pie keeper in hot, soapy water. Rinse well with a solution of vinegar + water, then dry thoroughly.
2. Using the sponge brush, apply Metal Primer to the pie keeper following manufacturer’s instructions and let dry.
3. Thin CCB slightly with water, then apply two to three coats to all surfaces of the pie keeper using the sponge brush. Allow to dry.
Painting
Note: Refer to the color worksheet for the following steps.

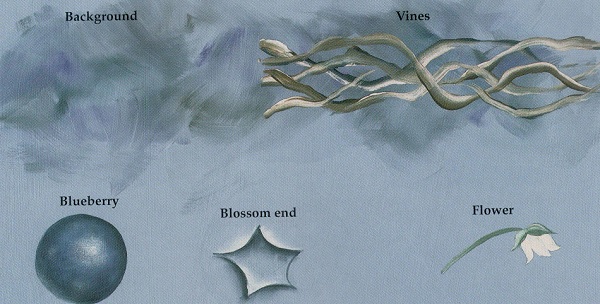
1. Background. Use the square wash to loosely slip slap slightly thinned CCB behind the design area, working one 5″ to 6″ area at a time. Lightly wipe the brush. While still wet, pick up and loosely slip slap a small amount of PU, MB, and FB onto the surface, lightly wiping the brush between colors. Pick up a bit more CCB and lightly slip slap over the previously applied colors to blend (be careful not to overwork this). Continue in this manner around the design area.
2. Vines. Load the round with BU, then pick up a small amount of MB on
one side of the brush and a small amount of LI on the other side. Tap gently on your palette to blend the colors slightly, then base in the vines in a circular pattern on top of the background by twisting and pulling the brush. Apply four to five layers of vines, reloading the brush as needed with the same colors. Allow to dry.
3. Trace the pattern onto tracing paper and transfer the three blueberry clusters onto the surface, spacing them evenly around the pie keeper and centering them on the vines.
4. Blueberries. Using the round, base in the blueberries with one coat of LB—the color should be a little uneven. Create washes of MB, PU, and FB by thinning each color with water. Wash the blueberries designated with an “M” on the pattern with MB, then dab on a bit of thinned PU for a soft, splotchy look. Wash the blueberries designated with an “F” with FB to help set them into the background. Sideload the angular with MB + a small amount of PU and shade the “M” blueberries, applying the color a little wider and darker on the lower left quadrant of each berry. Reinforce the shading on the darkest side if needed with the same color. Use FB + MB to shade the “F” blueberries in the same manner. Base in the red berries with two thin coats of MA. Apply a pale wash of MB to each berry, then shade with a sideload of MB.
Tint the dark areas of some of both colors of blueberries with a wash of MA—this should be applied to some of the berries that are on top of others to separate them. Using the small scruffy brush, drybrush LI slightly off center in the upper right quadrant of the blueberries to highlight. Note: To drybrush, load the brush with paint and scrub on a dry paper towel to remove almost all of the paint. Lightly scrub the surface in a circular motion, laying down just a hint of color. Build up as necessary, reloading the brush as needed. Sideload just a slight amount of CCB on the lower left edge of a few blueberries for the reflected light. Apply this strategically to help separate the blueberries that are on top of others.
Drybrush a small amount of CCB here and there in the dark areas of some of the blueberries to create the “bloom.” Using the liner and MB, outline the blossom openings on the blueberries (the nearer to the edge of the berry, the more oval the opening). Sideload the bright with MB and shade inside the opening and underneath the opposite side of the opening as shown on the worksheet. Highlight up against the shading with CCB or LI, depending upon how dark the area is. A few of the blueberries have a calyx, which can only be seen if the blossom end of the berry is in profile or not in view at all. Load the round with SG and tip into LI. Tap on your palette to blend, then place in the calyx.
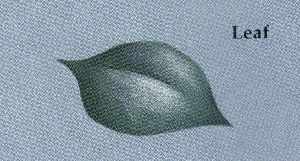
 5. Leaves. Base in all leaves with a mix of HI + LB (2:1). Apply a wash of SG to the leaves labeled “SG” on the pattern to brighten. Apply a wash of FB to the leaves labeled “F” to dull them and help them recede into the background. Wet
the leaves one at a time and dab on some pale washes of MB and PU randomly to tint. Sideload the angular with MB + BU to shade all the “SG” leaves. Use FB to shade the “F” leaves. Drybrush highlights with LI. Use the liner to add a few vein lines with SG + LI—this color should be just a little lighter in value than the previously applied color.
6. Stems. Load the liner with SG + BU to connect a few of the blueberries to the vine with stems.
7. Flowers. Load the liner with HI + SG (2:1), dip the side edge of the brush into LI, tap on your palette to blend, then paint in the curved flower stems. Again using the liner, brush mix LI + CCB (using more CCB for the back flowers). Sideload both edges of the brush with a pin drop of HI and apply three overlapping comma strokes. Apply the back flowers first. The calyxes are HI + SG (2:1) tipped in LI in the same manner as for the blueberries.
Finishing
Allow the piece to dry thoroughly. Apply several coats of satin spray, allowing adequate drying time between applications.

Leave a Comment