“I enjoy the lazy days of summer, swimming in warm water, and walking on the beach looking for seashells. I hope this lamp will remind you of those special times.”
Materials

-
Delia and Company Folk Art Tin Rectangle Lamp with Chimney, #FT-21 70 (6″ x 4-3/4″ x 1 3″)
-
DecoArt Americana Acrylics: Antique Rose, Bleached Sand, Buttermilk, Burnt Umber, Camel, Desert Sand, Driftwood, French Vanilla, Honey Brown, Hi-Lite Flesh, Khaki Tan, Light Buttermilk, Milk Chocolate, Raw Sienna, Sand, Spice Pink, Tangerine, Warm White
-
Scharff Brushes, Inc. Golden Taklon #2 and #3 round (Series 405), #10/0 liner (Series 480),
1 /2″ angular flat (Series 155);
1/4″ mop (Series 670) -
DecoArt Multi-Purpose Sealer; Americana Sealer/Finisher, Matte (spray)
-
Miscellaneous: dishwashing soap, medium-grit sandpaper, paper towels, pencil, stylus, tracing paper, transfer paper, water basin
Preparation
Note: Follow all manufacturers’ label instructions for proper product usage.
-
This piece comes already primed. Sand tin with medium-grit sandpaper, wash with warm, soapy water, and rinse. Let thoroughly dry.
-
Apply the first coat of base color to the entire lamp with a mix of Multi-Purpose Sealer + Sand (3:1). Apply three more coats of Sand (no sealer added). Allow to dry thoroughly between coats.
-
Transfer the pattern to the surface.
Painting
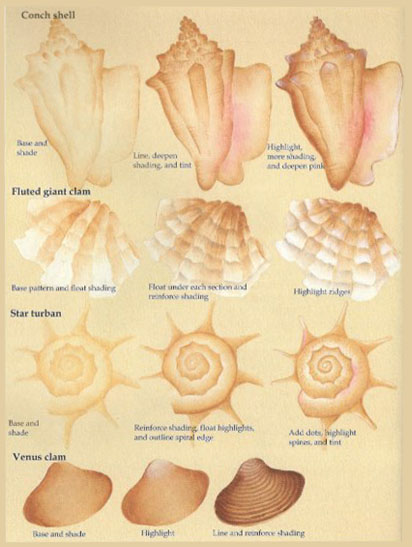
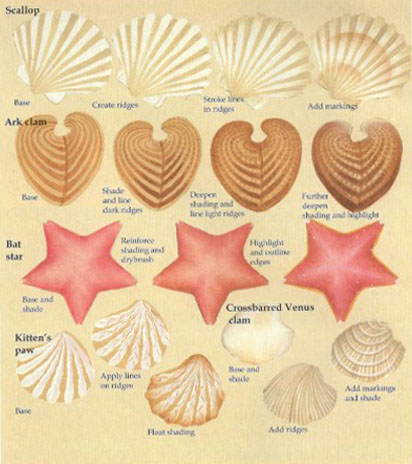
Note: Painting instructions for the shells are listed in the same order as they appear on the Color Worksheet. When painting the seashells, freehand as many of the details as possible. Start at the front of the shell and work to the back. If there are many ridges, apply a few lines to indicate the direction of the ridges, and then fill in the remaining lines.

-
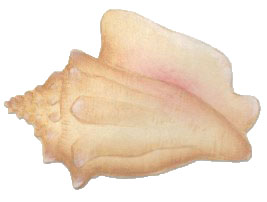
Conch shell. Base the conch shell with Buttermilk. Shade with Honey Brown. Use the liner and Raw Sienna to outline detail. Place lines between each top section, following the contour of the shell. Reinforce shading with Raw Sienna. Use the liner and thinned Raw Sienna to randomly place horizontal lines across the shell. Reinforce shading with Milk Chocolate, especially along outside edges. Float Warm White on the tips of the shell. Float very sheer Spice Pink on the inner lip of the shell, and reinforce with Antique Rose.
-
Fluted giant clam. Base with one coat of Light Buttermilk, allowing the pattern to show through. Float a series of Honey Brown strokes across the back and down the shell, following the contours of each shell section. Float down both sides of the recesses in the shell, starting at the top and getting lighter as you move down the shell. Float under each section of the shell with Driftwood. Reinforce the Honey Brown shading with Raw Sienna. With paint remaining in brush, hold the brush on edge and pull streaks down the shell, following the contours of the shell. Use the liner and Bleached Sand to add ridges on the recessed parts of the shell, starting at the bottom and pulling up on the first few sections. Float Light Buttermilk on the tips of the ridged sections. Reinforce the lower sections with Warm White.
-
Star turban. Base with Buttermilk. Apply a float of Camel, starting at the outside edge of the body and working inward to the center. Shade each of the spines with a float of Camel. Reinforce shading with Raw Sienna. Float the inside edge of the spiral on the body with Light Buttermilk. Outline the spiral edge with Raw Sienna. Use the tip of the liner to add Camel dots over the shading and Light Buttermilk dots over the highlight. Use the liner and Light Buttermilk to highlight each spine. Float sheer Spice Pink in a few places on the shell.
-
Venus clam. Base with Camel. Float Milk Chocolate on the right and left sides of the shell. Float Sand across the top of the shell. Use the liner and thinned Burnt Umber to line the shell, starting at the bottom and following the contour. Reinforce shading on the sides of the shell with Burnt Umber.

-
Scallop. Base scallop with Light Buttermilk. Use a round brush with thinned Desert Sand to apply ridges on the shell, pulling from front to back. Use a round brush with Light Buttermilk to stroke scallops over light ridges on the front edges of the shell. Repeat, if needed. Use the liner with Khaki Tan to apply a few lines in each Desert Sandridge. Add markings on ears with Desert Sand using the liner. Float front, back, and ears of shell with Desert Sand. Apply a few lines of Desert Sand back from the front edge on the Light Buttermilk ridge. Float an arc of Raw Sienna on the front and back of the shell and over the ears. Use the liner and Raw Sienna to apply small lines over the coloring on the shell.
-
Ark clam. Base with Camel. Use the liner and thinned Raw Sienna to apply the center line and ridges. Start at the bottom and follow the outside edges, allowing the ridge to get progressively smaller as you reach the top of the shell. Apply thinned Burnt Umber over the ridges at the lower front and center of the shell. Use the liner with thinned Burnt Umber to line across the ridge, following the growth direction of the shell.
Use the liner with thinned Honey Brown to line across the light ridges. Float Raw Sienna around the outside edges of the shell. Float Burnt Umber across the bottom front of the shell. Float French Vanilla across the top of the shell. Use the liner with thinned French Vanilla to line across the light ridge in the center front of the shell.

-
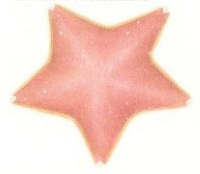
Bat star (starfish). Apply a coat of thinned Spice Pink over the shell, using the mop to soften. Float Antique Rose on the outer edges on the starfish, making the float deeper between the legs. Reinforce shading with Raw Sienna. Wet the starfish with water. Use a round brush to drybrush Hi-Lite Flesh, starting at the center and working down each leg. Use the mop to soften, if needed. Apply a “V” on the tip of each leg with Hi-Lite Flesh. Outline the edges of the starfish with Tangerine. Flyspeck with Hi-Lite Flesh.
-
Kitten’s paw. Base with Camel. Use the #2 round brush and Light Buttermilk to apply wiggly strokes, following the lines on the shell. Use the liner and thinned Raw Sienna to apply wiggly lines over the ridges. Float Raw Sienna over the front and back of the shell.
-
Crossbarred Venus clam. Base with Light Buttermilk. Shade the left and right edges with Driftwood. Float Honey Brown on the lower front edge and a few markings on top of the shell. Add ridges on the shell with Khaki Tan. Add ridges across the shell with Light Buttermilk. Apply Khaki Tan underneath the horizontal ridges. Shade the left and right edges with Khaki Tan.

Finishing
-
Background. Float Raw Sienna around seashells and edges of lamp.
-
Trim. Paint the trim with a thin coat of Raw Sienna.
-
Flyspeck the entire lamp with Raw Sienna.
-
Apply Sealer/Finisher, following manufacturer’s instructions.
If you liked this sea themed art project, you can go and give a try to our Lighthouse Canvas project.


Leave a Comment